We are accustomed to teaching with a model in front of a child, but these instructions should make it so that anyone can build one without our presence. We urge that parents and teachers be there to guide – but to allow the child to try to let the materials (and a picture of the final product) guide them. A wrong direction is always un-doable until you've glued something.
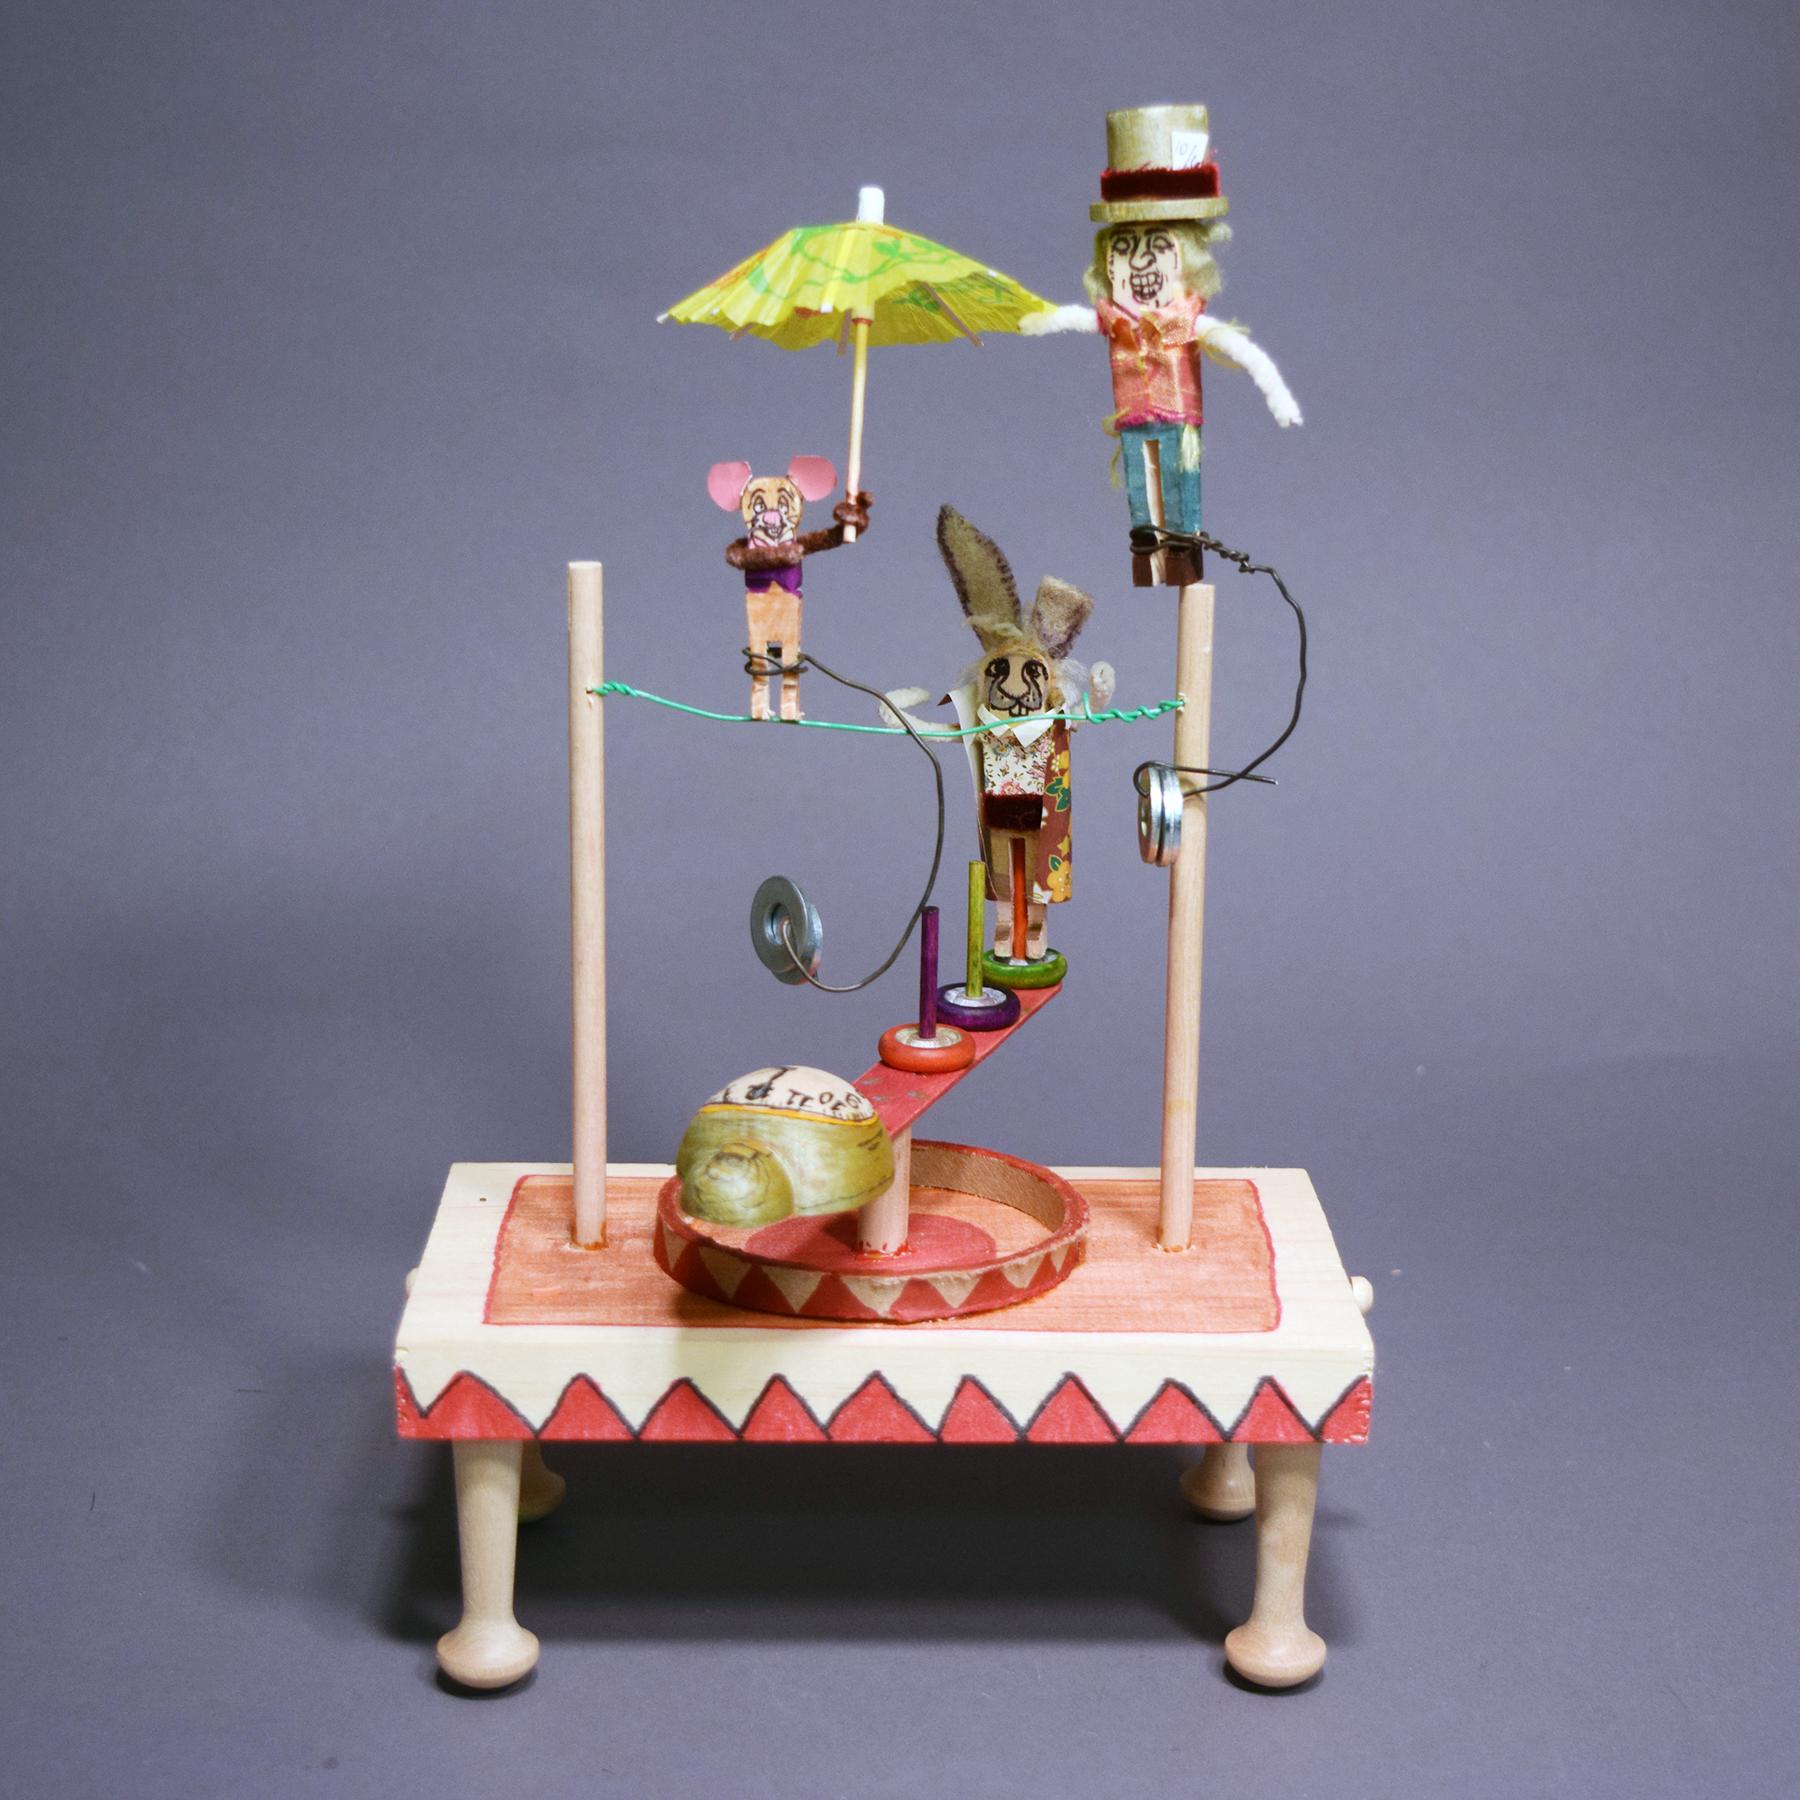
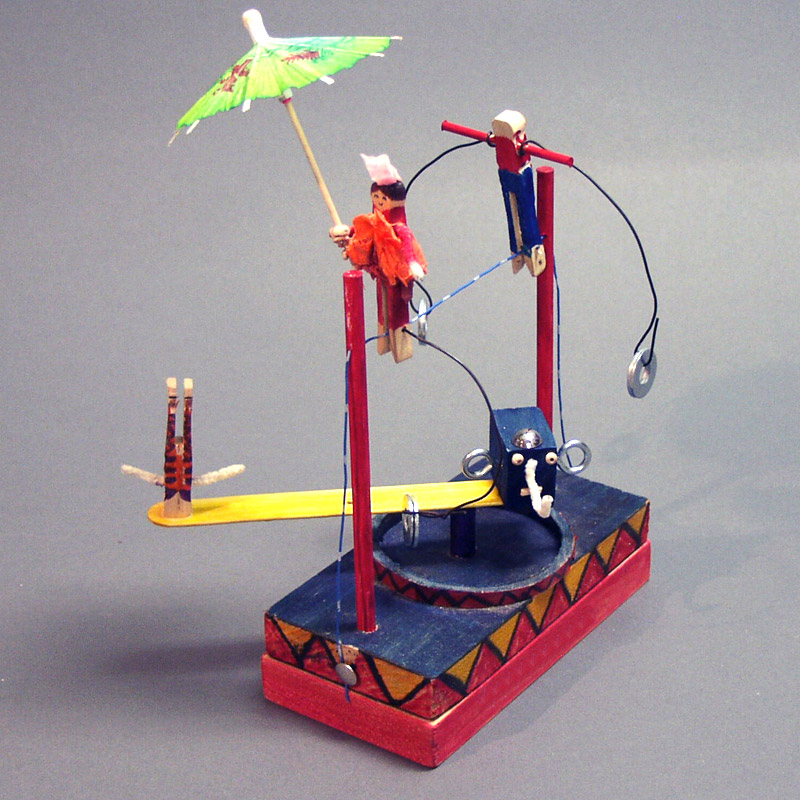
The Circus explores the art and science of balance, forces, center or gravity and performance. Conceived with a nod to artist /engineer Sandy Calder, each circus tests classic experiments at work. Lots of learning and lots of decoration.
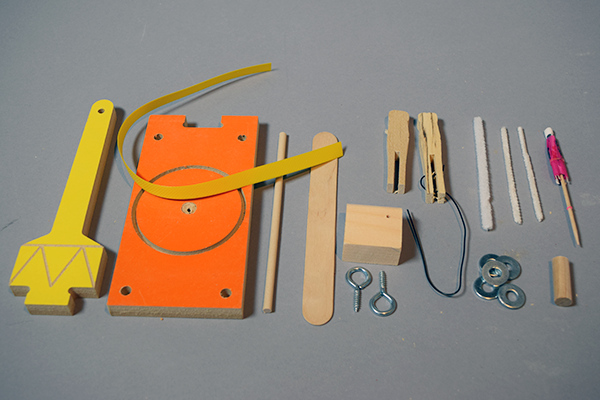
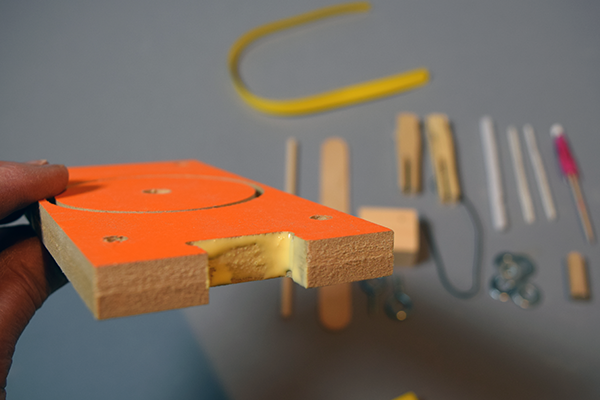
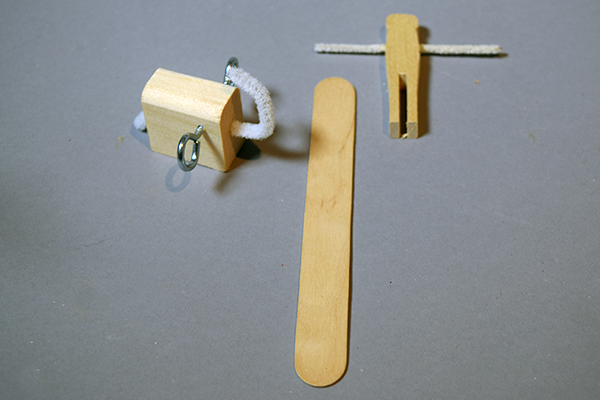
The Parts. We use Wood Glue but White glue is fine too.

Step 1. In the cutout at the end of the base, put some glue on the inside faces.

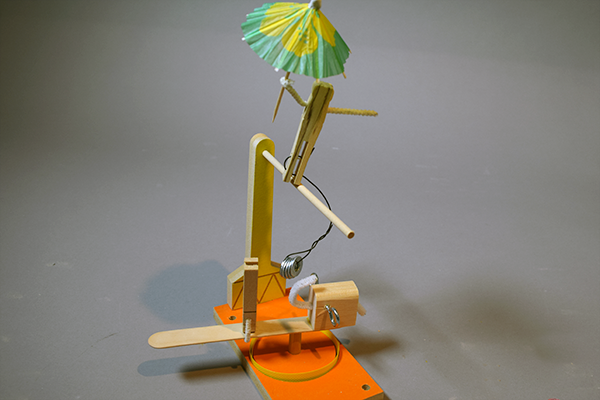
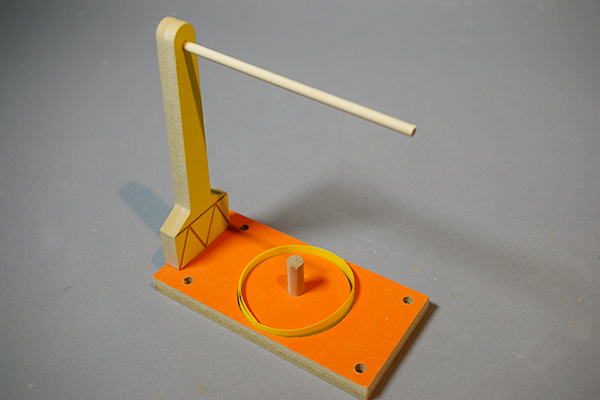
Step 2. Put the vertical 'pole' into the gluey cutout. Make sure it fits snugly. Let it dry. Put the 3/16" dowel into the hole at the top of the 'pole'. Put the short 1/2" dowel (the Fulcrum) into the hole in the center of the base. Place the yellow strapping tape into the slot which goes around the short dowel in the center. This is the Circus Ring.
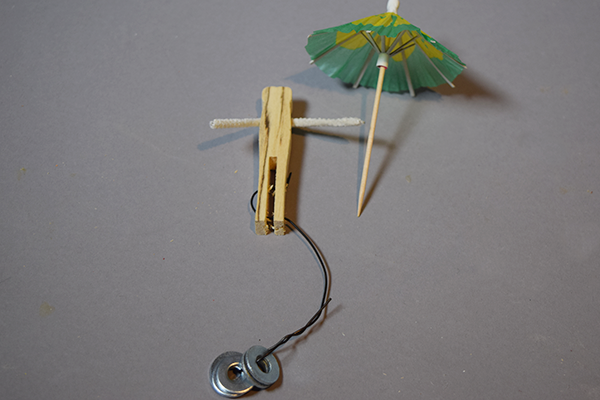
Step 3. The Elephant/Clown Balancing Beam: Put the fat pipe cleaner through the block so that the tail sticks out one end and the trunk sticks out the other. Screw the ears (screw eyes) into each side of the head. Put a skinny pipe cleaner through the arm holes of the Clown.
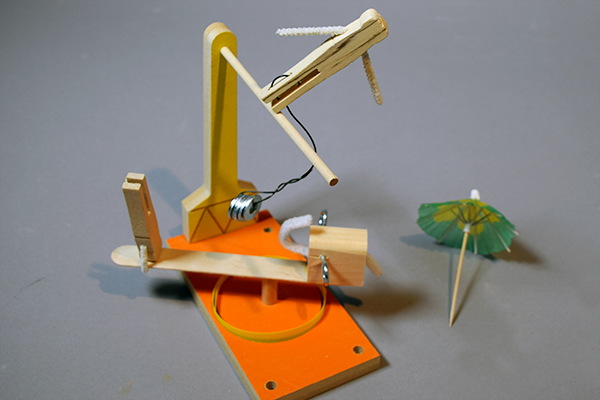
Step 4. Glue the elephant onto the tongue depressor (the Balancing Beam) at one end (maybe use a rubber band to hold it till it dries...) and take the Clown and fold his arms around the other end of the tongue depressor so that he can slide forward and backward on it. If you want to, you can glue him at the end, but it doesn't allow for experimentation to find the balance point more than once.
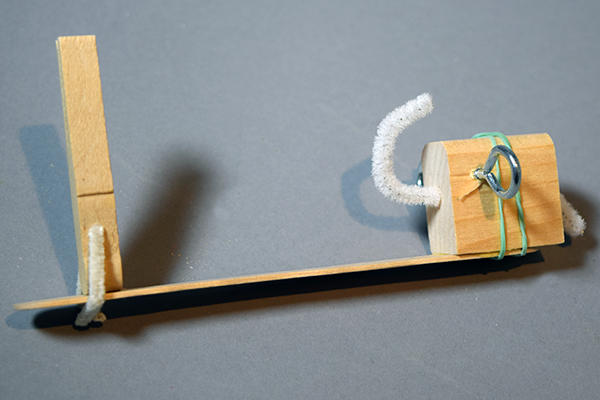
Step 5. Slide the washers (now counterweights) onto the end of the wire that is attached to the other clothespin Performer and fold the end of the wire so that they don't fall off. Curve the wire a bit like in the picture. Make sure the weights are directly beneath the performer for now.

Step 6. Now is when the magic happens. Try to balance the Performer on the 3/16" dowel by moving the wire with the hanging counterweights to the left or right of the center of the performer. S(h)e'll start to lean to one side or the other in the most amazing way! Try to see how far you can get the Performer to tip before they fall off. (You can balance this Performer on the tip of your finger too.) Now make the Elephant and Clown on the Balance Beam stay on the peg in the center. By moving the Clown forwards or backwards you will change the spot where the fulcrum must be.
Now, complicate things like adding an umbrella or move the Clown closer to the Elephant...And then, Decorate!