We are accustomed to teaching with a model in front of a child, but these instructions should make it so that anyone can build one without our presence. We urge that parents and teachers be there to guide – but to allow the child to try to let the materials (and a picture of the final product) guide them. A wrong direction is always un-doable until you've glued something.
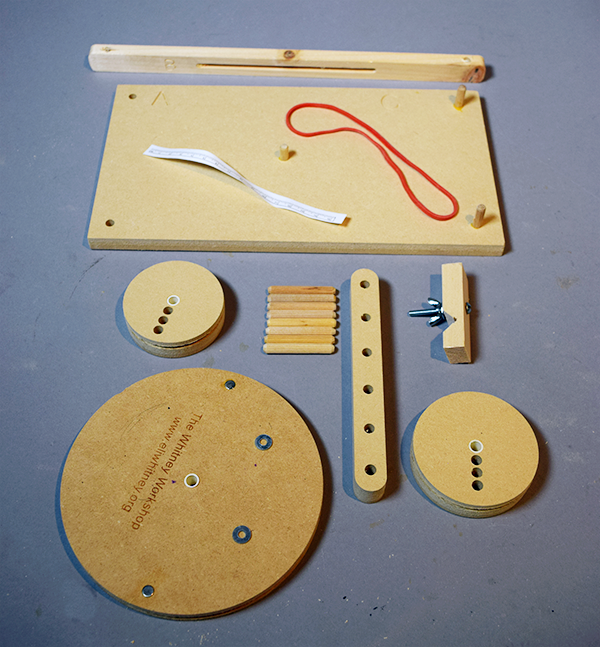
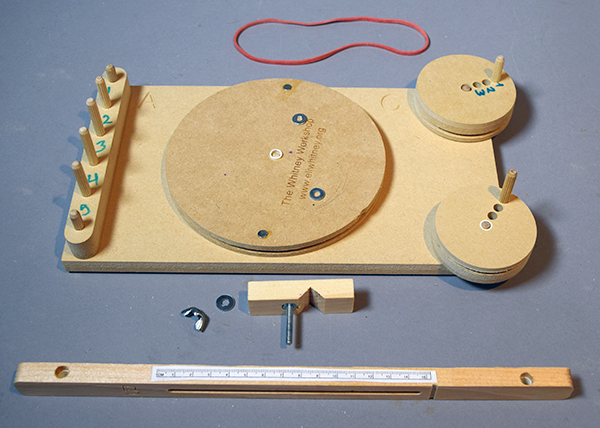
The Parts.

Step 1. Look at the picture.
a) Place the bar with 6 holes in it on the left side of the board. Put two of the dowels through this bar and into the base itself while the other dowels will just go into this bar. The drawing arm is steadied between these dowels. Number the spaces between them 1 through 5 as shown.
b) Put the very large wheel on the short dowel in the center of the board.
c) Put the larger of the other two wheels on the dowel in the upper right corner and the smaller of the two in the lower right corner. Number the holes in the upper one 1 through 3.
d) take the wing nut and washer off the bolt in the notched pen holder.
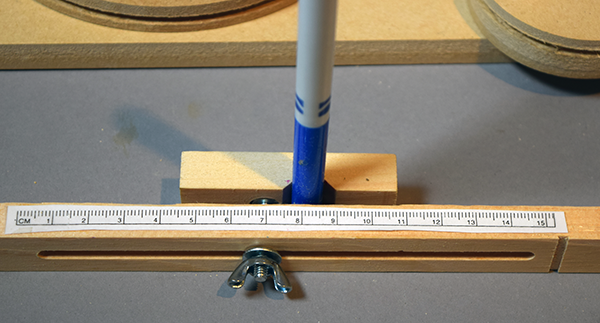
e) tape or glue the ruler to the top of the drawing arm piece so that it is evenly stretched out above the slot in the arm.
Step 3. Put the bolt through the slot in the drawing arm and place the washer on it and tighten the wing nut so that it will hold your pen or pencil.

Step 4.
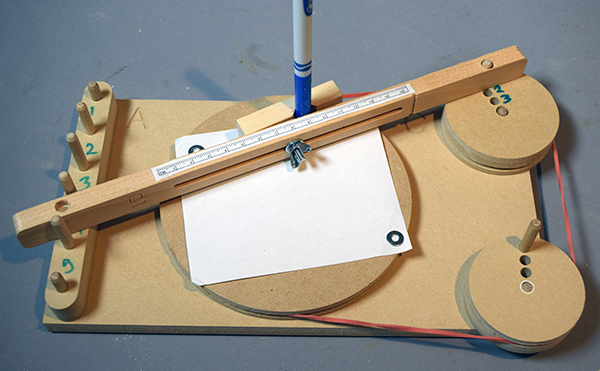
a) Stretch the rubber band around the wheels as shown in the slots of the wheels. The slots should all be at the same height above the base (so there is a right side up on those wheels) so the rubber band is at the same height all the way around.
b) Place one end of the arm on the peg sticking up from the top right wheel. The other end can be in any of the spaces along the bar on the left.

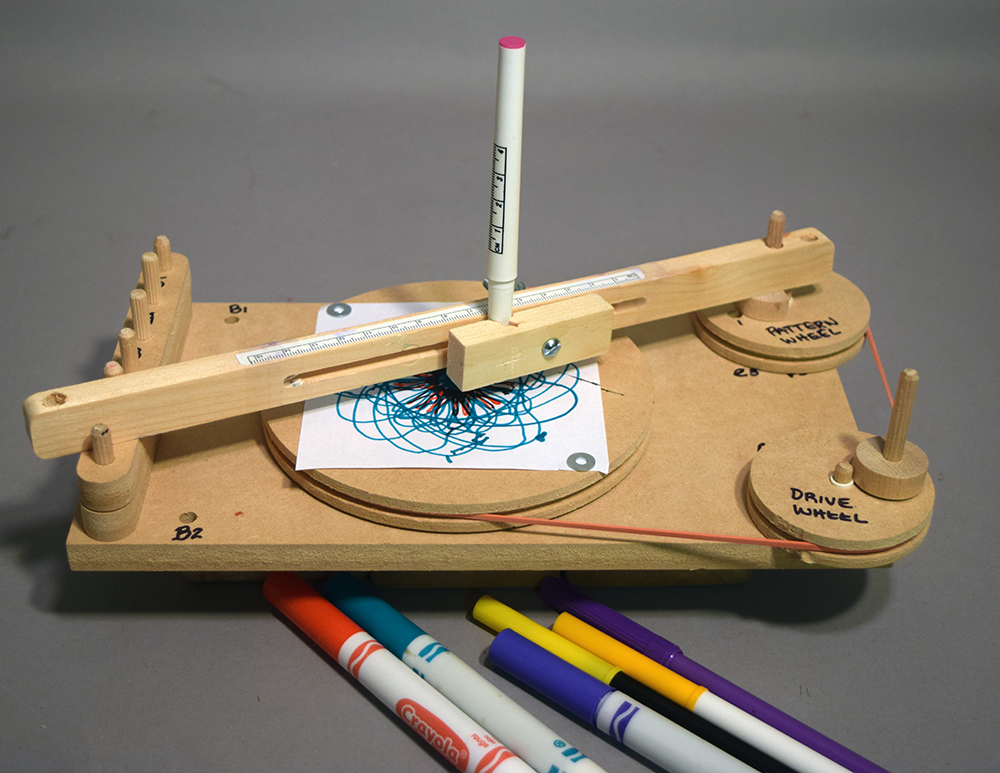
Insert a piece of paper and hold it down with the washers on top of the magnets embedded in the large wheel. Now start experimenting by turning the wheel on the lower right. Make sure the pen or pencil is on the paper and is heavy enough to make marks. You will notice that you will have to make a lot of turns before you get a finished pattern.
The coordinates for the drawing you have done using the way we set it up in these drawings is [A4, B9, C1]. Meaning the spaces between the pegs on the bar control one part of the design (that's the A), the pen is being held above the 9cm mark on the arm (that's the B) and the arm is attached to the upper right wheel over the #1 hole (that's the C). Get it? So if you gave those coordinates to someone with the same wheel, they should be able to set it up to make a design exactly like yours if they follow those coordinates correctly.
You will have to experiment to find out which setting changes the size of the drawing...or the number of loops...of the height...and so on.